本記事の前提
- この記事は『WordPressでの子テーマのつくり方、管理法』を基に Twenty Seventeenをテーマとしていることを前提としているので、子テーマって何?って人はそちらの記事を先にどうぞ。
今回のカスタマイズでやりたいこと
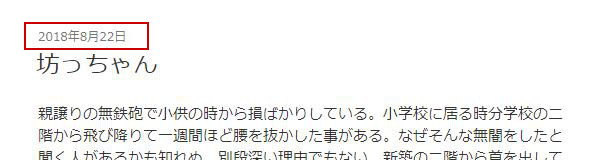
- .おおまかな部分は/template-parts/内の content.phpをゴニョゴニョすれば良いが、例えば投稿年月日を表示している部分などをカスタマイズしたくて対象のファイル(inc/template-tags.php)を子テーマにコピーして改造しても反映されない。
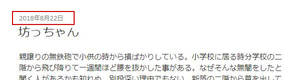
- そこで、今回はこの部分をカスタマイズしてみることにする。
template-tags.phpの部分をカスタマイズする準備
- 親テーマにある template-parts/post/content.php をコピーして子テーマに同じディレクトリ(フォルダ)を作成してペースト。
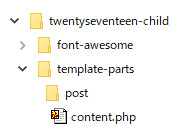
(こんな感じ) - 上記でコピーした content.phpを開いて 28行目あたりの以下のファンクション名を
echo twentyseventeen_time_link();
適当な名前に変更
echo hogehoge_time_link(); - 親テーマの inc/template-tags.php を開いて 31行目あたりから始まる以下の部分をコピー。
if ( ! function_exists( 'twentyseventeen_time_link' ) ) : /** * Gets a nicely formatted string for the published date. */ function twentyseventeen_time_link() { $time_string = '<time class="entry-date published updated" datetime="%1$s">%2$s</time>'; if ( get_the_time( 'U' ) !== get_the_modified_time( 'U' ) ) { $time_string = '<time class="entry-date published" datetime="%1$s">%2$s</time><time class="updated" datetime="%3$s">%4$s</time>'; } $time_string = sprintf( $time_string, get_the_date( DATE_W3C ), get_the_date(), get_the_modified_date( DATE_W3C ), get_the_modified_date() ); // Wrap the time string in a link, and preface it with 'Posted on'. return sprintf( /* translators: %s: post date */ __( '<span class="screen-reader-text">Posted on</span> %s', 'twentyseventeen' ), '<a href="' . esc_url( get_permalink() ) . '" rel="bookmark">' . $time_string . '</a>' ); } endif; - 子テーマの functions.phpにペースト。
- 文字列 twentyseventeen を上記 1. で変更した文字列に変更。
以下は twentyseventeen をすべて hogehoge に変換した場合。if ( ! function_exists( 'hogehoge_time_link' ) ) : /** * Gets a nicely formatted string for the published date. */ function hogehoge_time_link() { $time_string = '<time class="entry-date published updated" datetime="%1$s">%2$s</time>'; if ( get_the_time( 'U' ) !== get_the_modified_time( 'U' ) ) { $time_string = '<time class="entry-date published" datetime="%1$s">%2$s</time><time class="updated" datetime="%3$s">%4$s</time>'; } $time_string = sprintf( $time_string, get_the_date( DATE_W3C ), get_the_date(), get_the_modified_date( DATE_W3C ), get_the_modified_date() ); // Wrap the time string in a link, and preface it with 'Posted on'. return sprintf( /* translators: %s: post date */ __( '<span class="screen-reader-text">Posted on</span> %s', 'hogehoge' ), '<a href="' . esc_url( get_permalink() ) . '" rel="bookmark">' . $time_string . '</a>' ); } endif;
各記事のヘッダー部分をカスタマイズする方法
各記事ヘッダー部分の更新年月日に時間を追加
- 更新年月日に時間も表示したければ子テーマの functions.php の $time_string = sprintf( で始まる部分を以下のように変更。
$time_string = sprintf(
	$time_string,
	get_the_date( DATE_W3C )." ".get_the_time( DATE_W3C ),
	get_the_date()." ".get_the_time(),
	get_the_modified_date( DATE_W3C )." ".get_the_modified_time( DATE_W3C ),
	get_the_modified_date()." ".get_the_modified_time()
);
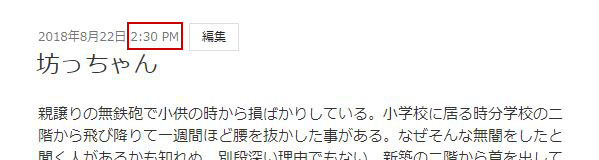
- すると、以下のように表示されるようになる。
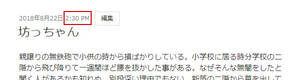
この部分は見やすさを考慮して小テーマのスタイルシート(style.css)でフォントの太さを普通に戻し、少し大きくしている。.posted-on, .entry-date, .byline, .cat-links, .edit-link { font-weight: normal; font-size: 12px; }
各記事ヘッダー部分の更新年月日の前に時計アイコンを表示。
- アイコンを表示するには『WordPressで Font Awesomeを使えるようにする』を参照。
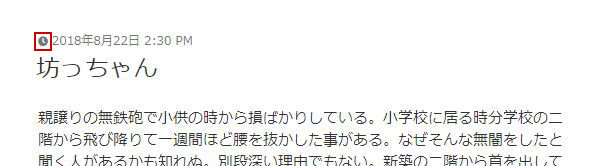
- 更新値月日の前に時計アイコンを表示したければ functions.php の return sprintf( で始まる部分を以下のように変更。
return sprintf( /* translators: %s: post date */ __( '<span class="screen-reader-text">Posted on</span> %s', 'hogehoge' ), '<a href="' . esc_url( get_permalink() ) . '" rel="bookmark"><i class="fas fa-clock"> </i>' . $time_string . '</a>' );
- すると、以下のように表示されるようになる。
各記事ヘッダー部分に投稿者(ユーザー)名を表示
- .日付の横に投稿者名を表示する場合、まず親テーマの inc/template-tags.php を開いて 12行目あたりから始まる以下の部分をコピー。
if ( ! function_exists( 'twentyseventeen_posted_on' ) ) : /** * Prints HTML with meta information for the current post-date/time and author. */ function twentyseventeen_posted_on() { // Get the author name; wrap it in a link. $byline = sprintf( /* translators: %s: post author */ __( 'by %s', 'twentyseventeen' ), '<span class="author vcard"><a class="url fn n" href="' . esc_url( get_author_posts_url( get_the_author_meta( 'ID' ) ) ) . '">' . get_the_author() . '</a></span>' ); // Finally, let's write all of this to the page. echo '<span class="posted-on">' . twentyseventeen_time_link() . '</span><span class="byline"> ' . $byline . '</span>'; } endif; - 子テーマの functions.php にペースト。
- twentyseventeen を任意の文字列に変更し、ユーザーアイコンを表示するタグを追加。
以下は twentyseventeen をすべて hogehoge に変換、11行目に <i class=”fas fa-user-circle”> </i> を追加。
(アイコンを表示するには『WordPressで Font Awesomeを使えるようにする』を参照)if ( ! function_exists( 'hogehoge_posted_on' ) ) : /** * Prints HTML with meta information for the current post-date/time and author. */ function hogehoge_posted_on() { // Get the author name; wrap it in a link. $byline = sprintf( /* translators: %s: post author */ __( 'by %s', 'hogehoge' ), '<span class="author vcard"><a class="url fn n" href="' . esc_url( get_author_posts_url( get_the_author_meta( 'ID' ) ) ) . '"><i class="fas fa-user-circle"> </i>' . get_the_author() . '</a></span>' ); // Finally, let's write all of this to the page. echo '<span class="posted-on">' . hogehoge_time_link() . '</span><span class="byline"> ' . $byline . '</span>'; } endif; - この部分はスタイルシートで非表示と指定されているので、子テーマの style.css に以下を記述して表示。
.byline { display: inline; } - 投稿者名がアルファベットの場合、すべて大文字で表示される指定になっているので、子テーマの style.css に以下を追加してノーマル表示に変更。
.byline { display: inline; text-transform: none; } - 小テーマにある content.php の if ( ‘post’ === get_post_type() ) { で始まる部分の echo twentyseventeen_time_link(); を上記 3.で命名したファンクション名に変更。
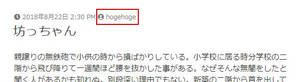
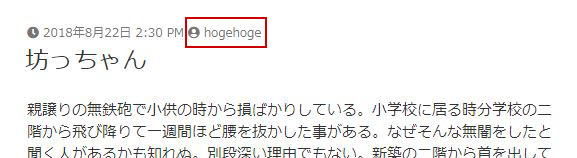
(この記事をの手順を最初からやっている場合は echo hogehoge_time_link(); の部分を書き換える)if ( 'post' === get_post_type() ) { echo '<div class="entry-meta">'; if ( is_single() ) { twentyseventeen_posted_on(); } else { hogehoge_posted_on(); twentyseventeen_edit_link(); }; echo '</div><!-- .entry-meta -->'; }; - これで以下のように表示されるようになるはず。
各記事ヘッダー部分にカテゴリーを表示
- 親から子へのコピーなどなど、いろいろ面倒なので以下のコードを子テーマの functions.php に貼るべし。
(アイコンを表示するには『WordPressで Font Awesomeを使えるようにする』を参照)if ( ! function_exists( 'hogehoge_entry_category' ) ) : /** * Prints HTML with meta information for the categories, tags and comments. */ function hogehoge_entry_category() { /* translators: used between list items, there is a space after the comma */ $separate_meta = __( ', ', 'hogehoge' ); // Get Categories for posts. $categories_list = get_the_category_list( $separate_meta ); // We don't want to output .entry-footer if it will be empty, so make sure its not. if ( ( twentyseventeen_categorized_blog() && $categories_list ) || get_edit_post_link() ) { if ( 'post' === get_post_type() ) { if ( $categories_list && twentyseventeen_categorized_blog() ) { // Make sure there's more than one category before displaying. if ( $categories_list && twentyseventeen_categorized_blog() ) { echo '<span class="cat-links"><i class="fas fa-folder-open"> </i>' . $categories_list . '</span>'; } } } } } endif; - 小テーマにある hogehoge_posted_on(); の下に hogehoge_entry_category(); を追加。
if ( 'post' === get_post_type() ) { echo '<div class="entry-meta">'; if ( is_single() ) { twentyseventeen_posted_on(); } else { hogehoge_posted_on(); hogehoge_entry_category(); twentyseventeen_edit_link(); }; echo '</div><!-- .entry-meta -->'; }; - ちょっと文字間がほしいので子テーマの style.css に以下を記述。
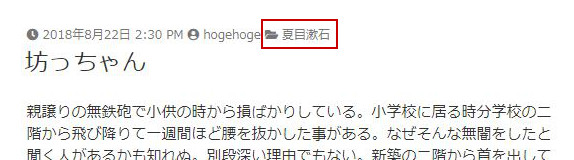
.cat-links { margin-left: 4px; } - これで以下のように表示されるようになるはず。
えらく長文になってしまったが、ざっとこんな感じでカスタムを進めるがよい。


